Written by: Madeline B. |
Your logo is a key part of your business identity. It helps customers recognize your brand and gives your website a professional look.
In this article, you’ll learn how to upload, resize, and delete your logo in the B12 Editor — plus, how to use B12’s new AI Agent logo generator to create a professional logo for your brand instantly.
Note: The logo you upload must be an image file, such as .png, .jpeg, .jpg, or SVG.
Adding your logo
1. In the left sidebar, go to ![]() Website
Website![]() Pages
Pages
2. In the upper-left corner of the header, click the sparkle icon ![]()

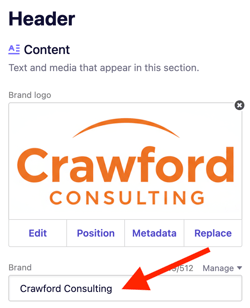
3. Click Edit Section.
4. In the left sidebar, under Brand Logo, click Choose from library.
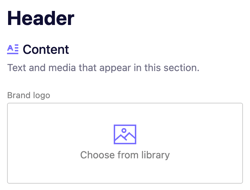
From here, you’ll have three options:
Library: Choose from media you’ve already uploaded or click Upload media to add a new file. Select Continue when done.

Search: Use the search bar to find free, high-quality photos from Pexels. Enter a keyword, press Enter/Return, and select your image. Then click Continue.
AI Assist: Click Ask AI Agent to create a logo. This will take you to the AI Agent tab.

Enter your business name, color preferences, style or mood, and any other custom details. Then press the up arrow ⬆ or Enter/Return on your keyboard to submit your request.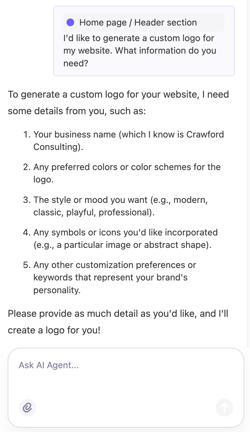
Wait a few moments while the AI Agent generates your logo. Once complete, your new logo will automatically appear in your website header.
You can continue chatting with the AI Agent to adjust the design or generate more variations.
Resizing your logo
1. In the left sidebar, go to ![]() Website
Website![]() Pages
Pages
2. In the upper-left corner of the header, click the sparkle icon ![]()
3. Click Edit Section.
4. Scroll to Header, then click Select under Logo size.
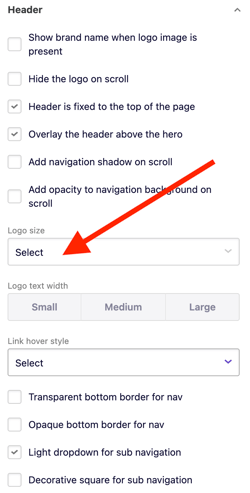
5. Choose your preferred size.
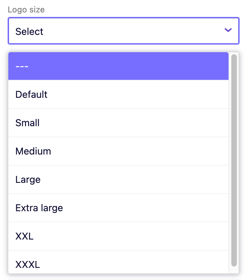
Note: If you select Large and your logo still appears too small, it may have extra white space around it.
Open the logo file on your computer, crop it more closely, then re-upload it.
Delete your logo
1. In the left sidebar, go to ![]() Website
Website![]() Pages
Pages
2. In the upper-left corner of the header, click the sparkle icon ![]()
3. Click Edit Section.
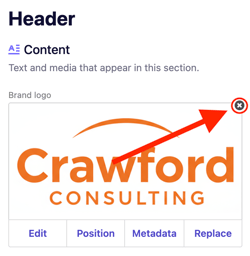
4. Click the X button in the upper-right corner of your logo to remove it.
Important: If you don’t have a logo, your website will automatically display your written brand name. You can edit this under Brand.