|
Written by: Madeline B. |
This feature is currently available only to users located in the United States. |

B12 Commerce helps you create professional invoices, send them to clients, and receive payment by credit card.
Note: You must verify your business before accepting payments. This is a one-time verification.
Adding banking information
1. In the left sidebar menu, go to ![]() Commerce
Commerce
2. Click Add banking details. (This is required for you to accept payments.)
Tip: If you do not see this button, follow these instructions to edit your business address and include the US as your Country.
3. You will be prompted to verify your identity and bank account through Stripe. Your business address must be a valid U.S. street address, not a P.O. Box.
Sending an invoice
1. Click Create Invoice. A preview will appear on the right while you customize the details on the left.
2. To edit the business contact information under From, click Edit under Business information, make changes, then click Save.
3. Add client information:
-
Click
Add new client. -
Enter the client’s name and email address.
-
Click
Save.
Note: Name and email are required. Saved clients can be searched in future invoices.

4. Add invoice details:
-
Choose
StandardorRecurring. -
Click
Invoice items>Add item. Create a new line item or select an existing one. -
Enter a title and price. (Description optional.)
-
Add as many items as needed.
Optional: Add tax and/or apply a discount (dollar amount or percentage).
Customizing the email
You can change the default email sent with your invoice. Options include:
-
Adding CC or BCC recipients.
-
Editing the subject line.
-
Adding custom text to the email body.
A preview appears on the right side of the screen.

Setting a next step
After a client pays, you can define what happens next. Options in the Next steps dropdown include:
- None – Display a success message.
- Complete a form – Direct to a form.
-
Schedule an appointment – Direct to a scheduling form.
-
Make a payment – Go to a checkout page (not recommended for invoicing).
-
Redirect – Direct to a page, URL, or file.

For example, to schedule an appointment:
-
Select
Schedule an appointment. -
Choose an existing scheduling form or create a new one.

-
Customize the success message if desired.

-
Click
Save. -
When the invoice is ready, click
Send.
Note: If the Send button is disabled, check your invoice settings. If Show Business Address is enabled, you must fill in all address fields (including City and State) before you can send the invoice. If you don't want your address to appear on the invoice, uncheck Show Business Address to remove this requirement.
Sending reminders
If an invoice is unpaid, clients automatically receive:
-
A reminder the day before the due date.
-
An overdue reminder the day after the due date.
To send an additional reminder:
-
In the invoice list, click the three dots under Actions.
-
Select
Send reminder. -
Customize the message and click
Send email.

Receiving payments
When a client pays, both you and the client receive confirmation emails. You can track payments under Payments in your account.
-
Available funds can be paid out immediately.
-
Pending funds become available 2–5 business days after payment confirmation.

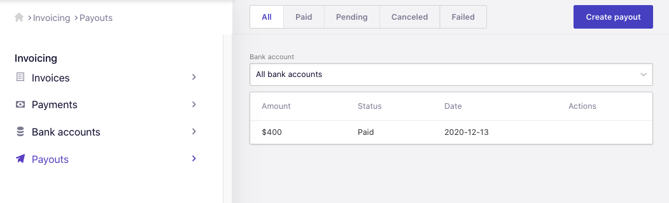
Creating payouts
To transfer funds to your bank account:
-
Go to Payouts.
-
Click
Create payout.
If needed, update your bank account under Bank accounts.