
Written by: Madeline B. Last updated: 23 Sep., 2025 |
If you want to add a Contact form to an existing page, you can do that by adding a new section.
Adding a contact form
1. In the left sidebar, click ![]() Website
Website![]() Pages
Pages
2. Choose the page where you want to add a section, then click Add section.
3. Click ![]() Form
Form

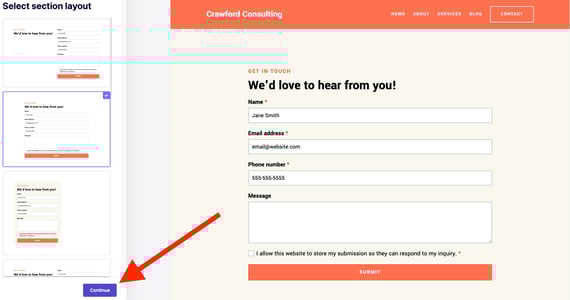
4. Choose a layout. The preview will automatically update on the right side of your screen. Click Continue once done.
Keep in mind, you can customize your layout after you select it or change it later!
New sections are added to the bottom of your page. Reorder your section by following these instructions!