|
Written by: Meredith Last updated: 11 Dec., 2025 |
When you send an invoice to your client, they are automatically enrolled in a sequence of emails tailored to different circumstances related to the invoice. These emails are triggered by various events, such as recurring billing, client enrollment in auto-pay, payment status updates, and more.
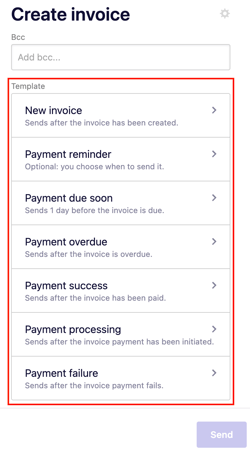
Below is a list of emails your client may receive:
-
New Invoice: The initial email containing the invoice details.
-
Payment Reminder: Sent three days before the invoice due date, reminding the client to pay.
-
Invoice Due Soon: Sent the day before the invoice due date.
-
Invoice Overdue: Sent the day after the invoice due date if payment hasn't been received.
-
Auto-Payment Success: Sent when the client enrolls in auto-pay successfully.
-
Payment Success: Sent when the client pays the invoice without using auto-pay.
-
Auto-Payment Failure: Sent if the client is enrolled in auto-pay, but the payment fails.
-
Payment Failure: Sent if the client attempts to pay, but the payment fails.
-
Auto-Pay Turned On: Sent when auto-payment for a recurring invoice is activated.
-
Auto-Pay Turned Off: Sent when auto-payment for a recurring invoice is deactivated.
-
Payment Method Added: Sent after adding a payment method for a recurring invoice.
-
Payment Method Removed: Sent after removing a payment method for a recurring invoice.
-
Invoice Cancellation: Sent after an invoice is canceled.
Customizing these templates allows you to use your own voice while still including the important billing information your clients expect.
Updating an email template
1. In the left sidebar menu, go to ![]() Payments and Invoicing
Payments and Invoicing
2. Create an invoice as you normally would by entering your business information, client details, and invoice items.
3. Under Template, select the transactional email you want to edit.
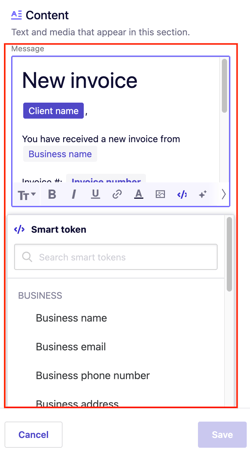
4. Under Content, click inside the message text box to begin editing.

Tip: Click the ![]()

5. Update the text, including any purple fields.
These purple fields are smart tokens, which automatically pull in details like the client’s name, invoice number, or due date.
When the email is sent, each token is replaced with the correct information for that specific client.
6. Click Save.
7. To continue sending the invoice, click Create invoice in the top-left corner to return to the invoice screen.