|
Written by: Meredith Last updated: 30 Dec., 2025 |
You and your clients can sign contracts and documents directly through a secure link. There are no monthly limits on the number of documents you can send or eSignatures you can collect.
Tip: If you want to reuse a document in the future, consider creating a template instead. Learn how to create a template.
Creating a new contract document

Note: If you've created a document previously, click +New Document in the top right corner.
3. Click Blank document.
- Enter the document name.
- Select signatories.
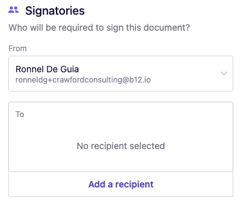
-
- You can customize the sender from the From section.
- Click Add a recipient to add a recipient from your existing list, or you can create a new one by clicking Add new.
- Upload a PDF document. Optionally, you can add a Signer PIN.

Note: The Signer PIN is a way to make sure your document is secure. Add a layer of security by requiring all parties to enter a code before viewing and signing your document. To communicate the PIN, we would recommend sharing it with your client by phone (most secure) or text.
- Next steps functionality helps you customize and control what happens after your client performs a certain action on your website, such as signing a document.

-
- You can customize the Success message after submission field.
- From the Next step dropdown, select one of the following:
-
-
- None - stay on the same page and only display the success message. Note: This action is not recommended for this tool.
-
Complete a form - go to the selected form.
-
Schedule an appointment - go to the selected scheduling form
-
Make a payment - go the the selected checkout page
-
Redirect to another page - go to the specified section / page / URL / media. This is selected by default.
-
Note: Make sure you provide the required details for your chosen step, such as selecting a payment template if you choose Make a payment.
4. Once all required information is added, the Generate document button becomes active. Click Generate document to open the markup view.
5. From the Recipients panel on the right, select a party. You will be shown in green and your client will be shown in blue.

6. Drag and drop fields such as signature or date fields onto the document.
-
Resize or move fields as needed.
-
Mark fields as required by checking the box at the top left of the document.

7. When finished, click Send in the top-right corner. The document appears in your eSignatures dashboard with the status Sent.

-
Both you and your client will receive an email from Xodo, B12’s eSignature provider, with a secure link to view and sign the document.
-
You’ll also receive notifications when your client opens and signs it.
-
Once all parties have signed, both you and your client receive a PDF copy by email, and the document status updates to Signed.