
|
Written by: Meredith Last updated: 13 Oct., 2026 |
|
This feature is currently available only to users located in the United States. |

An invoice template is a reusable invoice with your line items and amounts already filled in. To make one, go to Commerce > Templates and click Create template, or use Create template on an invoice you already have. When you create an invoice, pick your template instead of Blank invoice, and its contents are copied into the new invoice. For an overview of sending invoices and tracking payments, see Getting started with B12 Commerce.
Creating an invoice
1. In the left sidebar menu, click  Commerce
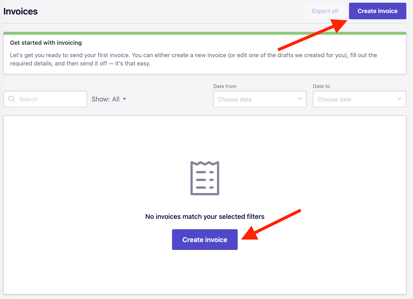
2. Click Create invoice.
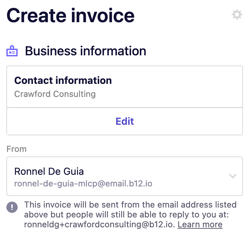
3. Under Business information, click Edit to update your company details.
You can also change the From field, which controls which email address sends the invoice.
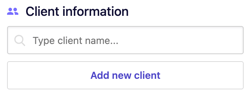
4. Under Client information, search for an existing client by typing their name, or click Add new client.
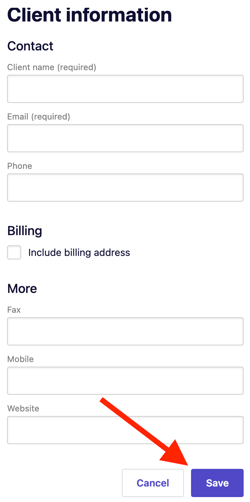
If you added a new client, enter the customer’s contact and billing details, then click Save.
5. Under Invoice details, choose the type of invoice you want to send:One-time, Recurring, or Proposal.
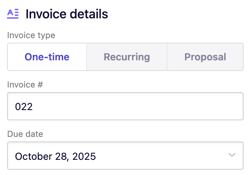
You can edit the invoice number and due date.
6. Click Add item.
To use a previous invoice item, use the search tool to browse for an existing line item. Use the checkboxes to select the items you want to include. Add as many line items as needed.
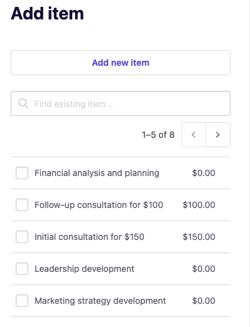
7. When finished, click Add item again to confirm your selections.
8. Edit your invoice email template. You can adjust CC and BCC fields — press Enter/Return after each address to confirm.
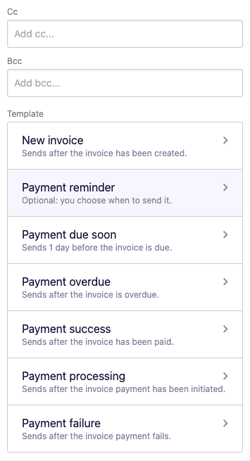
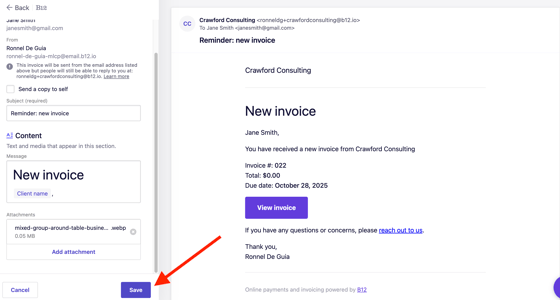
Click on any invoice template to edit the subject, message, and attachments. A live preview appears on the right, so you can review changes before sending them.
Click Save when you are finished.
9. Customize the Success message after the payment field.
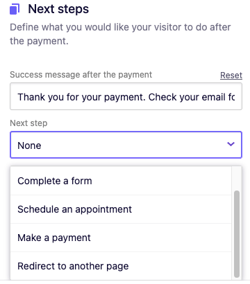
Select a Next step of your choosing. Here are the five options available in the dropdown.
- None - stay on the same page and only display the success message
-
Complete a form - go to the selected form
-
Schedule an appointment - go to the selected scheduling form
-
Make a payment - go to the selected checkout page. Note: This action is not recommended for this tool.
-
Redirect to another page - go to the specified section / page / URL / media
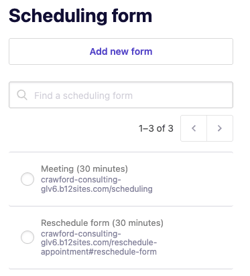
Make sure to provide next step details by specifying the target such as Add form / Add scheduling form / Add payment details / Add redirect.
- For this example, we will select
Schedule an appointmentsince this is a common next step after a client completes a payment. - Click
Add scheduling form. You can select your existing forms orAdd new form.
Send.See also:
- Marking an invoice as paid
- Sending reminder emails for your B12 invoices
- Setting up a recurring invoice series
- Refunding a payment in B12 Commerce
- Exporting invoices to a CSV file