 Written by: Madeline B.
Last updated: 20 May, 2026 |
This feature is currently available only to users located in the United States. |
Recurring invoices are sent automatically on a weekly, monthly, yearly, or custom schedule. This is useful for ongoing services, retainers, or repeat billing without needing to create a new invoice each time.
Creating a recurring invoice series
2. Under Invoice details, select Recurring.

3. Choose a due date for the first invoice using the calendar.

4. Under Repeat, customize how often the invoice repeats.
- Monthly on the first day
- Monthly on the last day
- Weekly on Friday
- Monthly on [due date for the first invoice]
- Daily
- Custom

By default, invoices repeat monthly on the first day and end after six invoices.
5. Under Ends, choose how long the series should run:
-
Never
-
After a set number of invoices
-
After a specific date

If you select After a date, adjust the additional fields to define the exact frequency and duration.
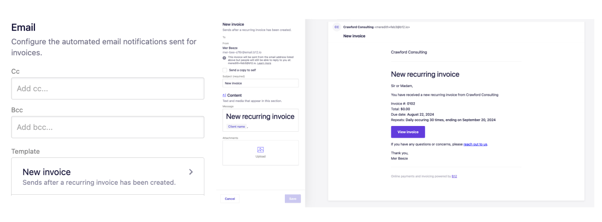
6. Click New invoice email to preview a summary of the recurring invoice series.
7. Send the invoice to start the series.
Viewing a recurring invoice series
1. In the left sidebar menu, click ![]() Commerce
CommerceInvoices .
2. Open the Show: All dropdown.

3. Select Recurring to view all active recurring invoice series.

Updating a recurring invoice series
Recurring invoice series cannot be edited directly after they are created. To make changes, use the workaround below.
1. In the left sidebar menu, click ![]() Commerce
CommerceInvoices .
2. Click the three-dot menu on the right side of the invoice then select Duplicate.

3. Edit and send the duplicated recurring invoice series.
4. Click the three-dot menu on the original series and select Mark as paid.

5. Click Continue. The status will change to Paid.