 Written by: Katelyn Gray
Last updated: 14 Nov., 2025
|
This feature requires at least one Client Engagement seat. View available plans and pricing here. |
B12 Email Marketing makes it easy to automatically send emails to visitors who submit a form on your website. Once a visitor submits a form, such as a contact form or newsletter signup form, they’ll automatically receive an email confirming their submission. Additionally, you’ll receive an email alerting you to a new form submission.
Setting up an automated email isn’t much different from setting up a one-time email.
Creating an automated email
1. In the left sidebar menu, click ![]() Email marketing
Email marketing
2. Click Create email.

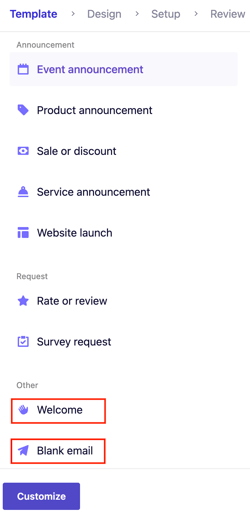
3. Under Template, scroll down and select Welcome email or Blank email, then click Customize.
4. Use the Sections and Style panels to customize your email’s text, images, and appearance. When you’re finished, click Continue.

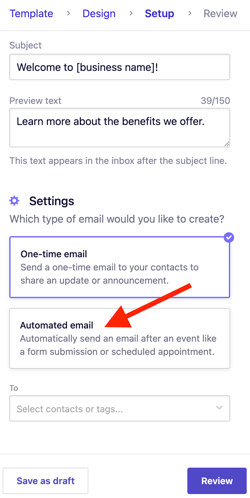
5. At the Setup step, scroll down to Settings, then select Automated email.
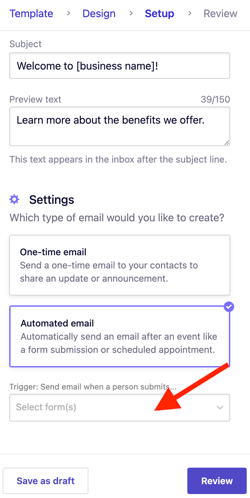
6. Under Trigger, click Select form(s) to associate with this automated email and trigger an email after submission.
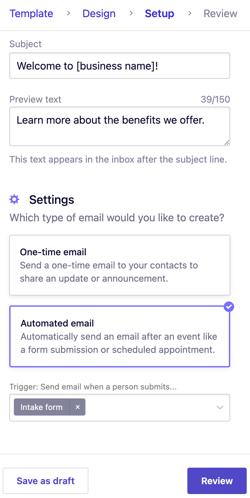
7. The trigger should appear like this Trigger name | x. Click Review to proceed.
8. Send a test email to confirm everything looks correct. Once satisfied, click Enable automation, then confirm by selecting Yes, enable automation.


Now, whenever a visitor submits one of your connected forms, they’ll automatically receive your confirmation email!
To view all your enabled automated emails, go to the left sidebar menu and click ![]() Email marketing
Email marketingAutomated.