Connect your Google domain to your B12 website by updating your DNS records.
Important: Google Domains was purchased by Squarespace Domains in 2023. Some users may be migrating to Squarespace Domains automatically.
Squarespace users should refer to our automated domain connection instructions here. Google Domains customers should continue with the steps below.
Step 1 - Add your domain to your B12 account
1. Log in to the B12 Editor.
2. From the Home menu, click Domains.
3. If this is your first domain, click Connect existing domain.

If you've added a domain previously, click Add domain, then Connect existing domain.

4. Enter your domain, starting with www.

-
Check the Make this my primary domain box if you want this domain considered your official domain by search engines. We accomplish this by automatically adding a canonical tag to all pages of your website pointing to your primary domain.
-
Check Enable email sending for this domain if you want to be able to send emails through B12, but you are using another email service to receive emails. See more information here.
-
Check Enable email forwarding for this domain if you would like to create a custom email address. See more information here.
Check the Make this my primary domain box if you want this domain considered your official domain by search engines. We accomplish this by automatically adding a canonical tag to all pages of your website pointing to your primary domain.
Check Enable email sending for this domain if you want to be able to send emails through B12, but you are using another email service to receive emails. See more information here.
Check Enable email forwarding for this domain if you would like to create a custom email address. See more information here.
5. Click Sync domain, then click Continue.

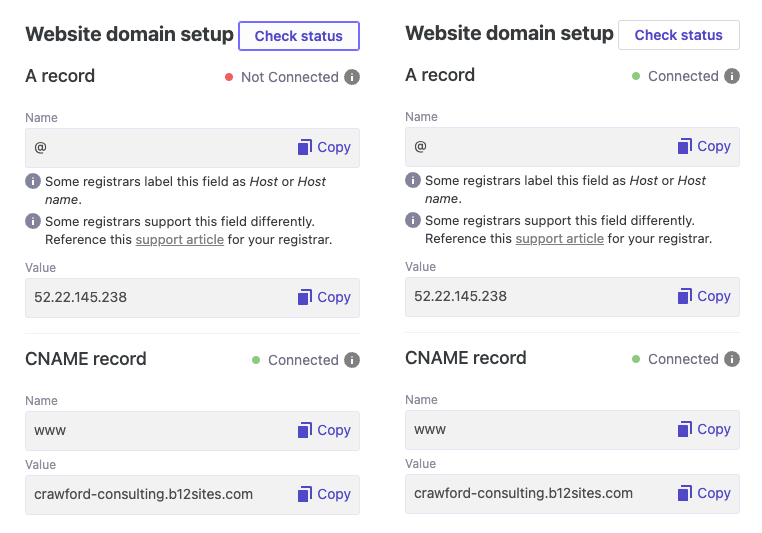
7. Below, configure your domain manually by adding these records, copy the CNAME Required Value by clicking the Copy button next to it.
Note: Your CNAME Value will end in b12sites.com

Keep this tab open so you can reference these values and finish your domain setup.
1. In a new tab, log in to domains.google.com.
2. Find the domain you want to connect to your website and click Manage.
3. Click DNS along the left menu.
4. Click Manage custom records.

5. Delete any existing A Records with a blank Host name by clicking the trashcan icon.
Delete any CNAMEs with the Host name www.
6. Click Create new record at the bottom. Add an A Record with these values:
-
Leave the Host name field blank.
-
Set the Type to A
-
Leave TTL as the default value
-
Set Data to 52.22.145.238
Leave the Host name field blank.
Set the Type to A
Leave TTL as the default value
Set Data to 52.22.145.238
7. Click Create new record again and add a CNAME with these values:
-
Set the Host name to www
-
Set the Type to CNAME
-
Leave TTL as the default value, usually 3600
-
In Data paste the CNAME value you copied from the B12 Editor.
Set the Host name to www
Set the Type to CNAME
Leave TTL as the default value, usually 3600
In Data paste the CNAME value you copied from the B12 Editor.
The records should look like this:

8. Click Save.
9. Return to the B12 Editor and click each Copy button if you haven't yet. Then click I have added 2/2 records above to my domain's provider.

If your records were added correctly, each record will show as Connected with a green light within a few minutes to a few hours.

7. Click Publish or Save.

Note: It may take a few hours for your Domain to show as Connected in the Editor, and it may take 24-48 hours for your B12 website to appear on your domain.
If you need help, please reach out to our Support Team through our live chat option or through email at hello@b12.io
