Editing a blog post
Learn how to make changes to an existing blog post.

Written by: Madeline B. Last updated: 07 Oct., 2025 |
If you already have a Blog Feed on your website, you can edit any post directly from the B12 Editor. Use the steps below to update your blog’s text, images, and other details.
Note: In order to edit blog posts, you should already have a Blog Feed. See these instructions to add a Blog Feed to your website.
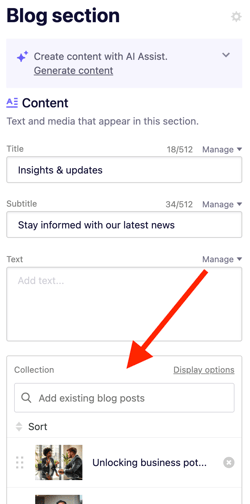
1. In the left sidebar, open your Blog Feed section and find the Collection field.

2. Click the blog post you’d like to edit.
Click the gear icon

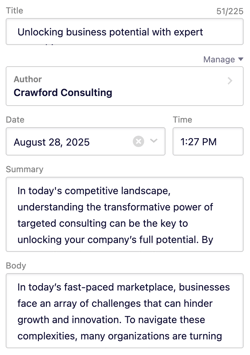
3. Update your post’s Title, Author, Date, Time, and Summary by clicking in each text field and typing your changes.

To edit the main text of your blog post, click the Body field. You can scroll up and down in this field to make changes.

Tip: Click the pop-out icon in the bottom right to edit in a larger view.

From here, you can use a variety of tools to edit your text.

To change the featured image, click the Replace button, choose from Library, Search, or AI Assist, then click Continue.

4. When you’re finished editing, click Go to [blog post name] at the top to review your updates.

5. To make your changes live, click the Publish button in the top-right corner of your editor.
